How to Install Lightroom Presets
PixelPeeper allows you to download settings in an XMP format that you can add to
Lightroom and use it as a regular preset.
For mobile presets, see:
Lightroom Mobile Presets - Download DNG
.
XMP Presets (current version of Lightroom)
How do I use the downloaded preset file?
- Open Lightroom
-
Select Develop module
-
Right-click on any any preset group (e.g. User Presets,
or Color)
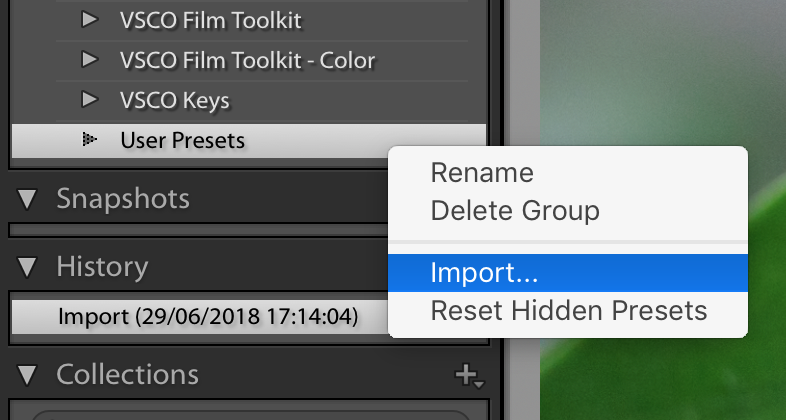
-
Click Import
- Select the downloaded .xmp file
-
Your new preset will be placed in a PixelPeeper group.
If you downloaded the "full" version of the XMP preset, you'll find it in the User Presets group.
Imported presets don‘t show up in Develop
-
Open Lightroom Preferences, select the Develop tab
-
Make sure to select Show Partially Compatible Develop Presets.
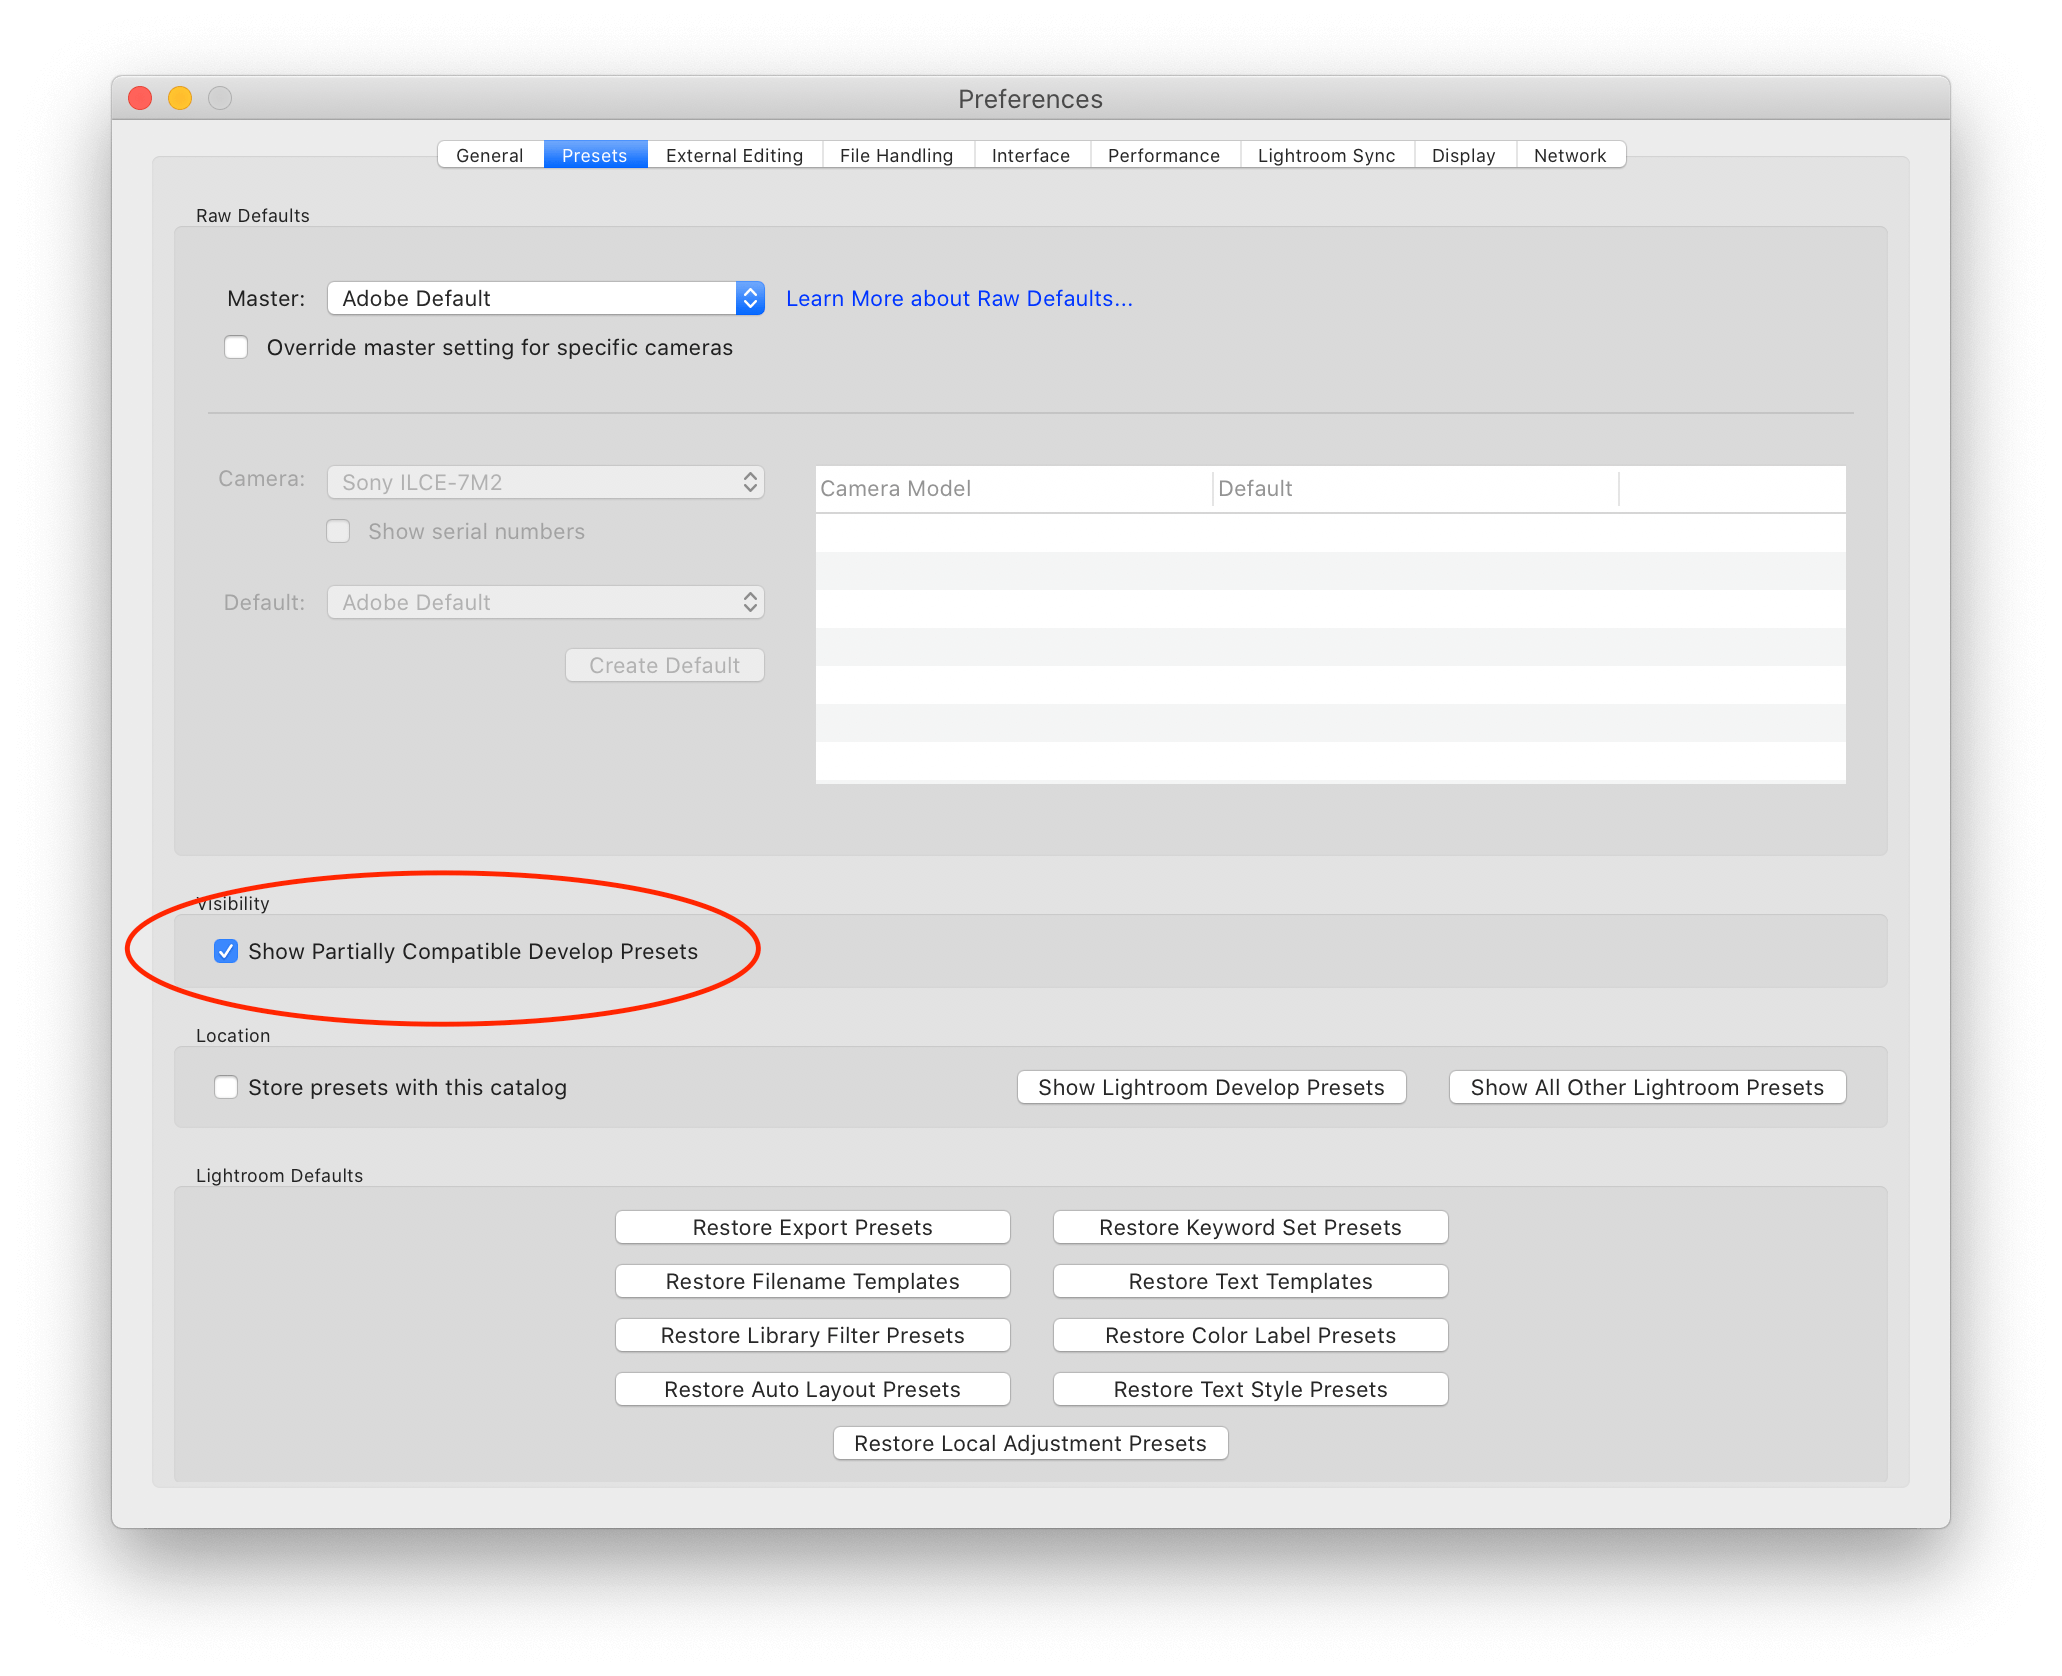
Without this setting, by default Lightroom will hide presets that can‘t be fully
applied. Most of the time it‘s because of a missing camera profile.
.lrtemplate Presets (older versions of Lightroom)
How do I use the downloaded preset file?
You have to put the downloaded .lrtemplate file in the Lightroom Presets directory
(e.g. in User Presets)
After that you‘ll need to restart Lightroom.
How do I find the presets directory on my computer?
- Open Lightroom
-
Select Develop module
-
Right-click on a selected preset (Presets section on the left)
-
Click Show in Finder (or Show in Explorer on Windows)
-
Copy .lrtemplate file to the chosen directory (e.g. User Presets)
- Restart Lightroom